Venomancer & Pet Guide by Vetnara (Red)
What’s the point of a Venomancer?
-Venomancers are a support-oriented class with strong DPS capabilities once they get enough investment into the gear. They’re one of the cheapest classes to get started, and are strong in both PVE and PVP, making them one of the better choices for just starting out on the server.
Which stats should I use? Are there multiple builds?

Venomancers are an AA (Arcane Armour) class, which means the main attributes they scale off of are MAG and M.ATT.
Stat allocation for Venomancer is fairly straight forward, with little variation. There are just a few things you want to keep in mind, based on your gear as well as current gear progression.
There are 3 stat allocations, one for people starting out with the class as their first character, and another for more experienced people that run the class as an alt account, where they already have access to resources such as gold and gear skips. The third is experimental mostly.
If you’re brand new to the game I suggest going with a hybrid VIT/MAG build. This will make it easier for you to survive the early levels and early endgame, as well as deal okay damage.
The class requires 60 STR in order to wear the Rank9 Pataka, and 75 STR in order to wear Crown of Madness/Armageddon, the endgame DD helmet.
VIT/MAG Hybrid: 3MAG, 1VIT, 1STR every level, until you reach 60 STR. After which you will swap to 3MAG 2VIT.
If you’re a more experienced player, you can start with the “glass cannon” pure DPS build. This is much stronger in terms of damage but will make you vulnerable especially during early lategame, meaning you will need better gear to make use of this build.
FULL MAG DPS: 4MAG, 1STR every level, until you reach 75 STR. After which you will swap to 5MAG every level.
A third and final build is the full VIT build. This is generally only recommended for people willing to use their veno purely as an alt account, not meant to PVP and/or DD.
FULL VIT: 3MAG, 1STR, 1VIT until you reach 60 STR and 300 MAG, after which you dump all available points into VIT.
Skill to prioritise / max out first with Spirit
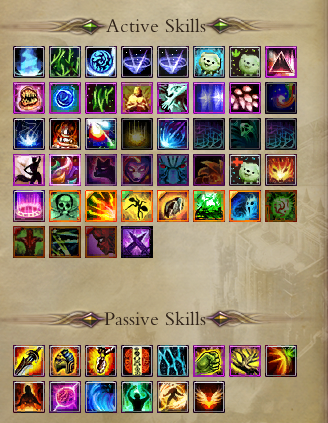
The main skills you’ll be using on Venomancer for the vast majority of gameplay while leveling are the following.
Human form: Venomous Scarab, Noxious Gas, Ironwood Scarab, Parasitic Nova, Bramble Guard
Fox form: Amplify Damage, Soul Degeneration, Purge
All passives as soon as they’re available
If you are out of spirit and wondering which skills to max out first, I’d start with those. Most skills on Venomancer are useful, but those are the main ones you’ll need to have maxed out as soon as possible to be as efficient as can be.
Which skills should I avoid learning/merging?

There is only a single skill that’s debatable whether or not it’s worth merging once you get to Primal. That is Redstone Venomworm. However, this only applies if you’ve gone DEMON CULTIVATION. If you’ve gone Sage, Redstone is always the better choice.
This ability combines 2 skills into a single one. Namely, Blazing Scarab and Ironwood Scarab. The combined skill will gain part of the stats of both Blazing and Ironwood, but in a different way. The important one to keep in mind here is Ironwood.
Ironwood Scarab (demon) will either reduce enemy physical resistance to 0, or do nothing. This is important because it cannot interfere with other classes applying a physical resistance debuff. And it being reduced to 0, it’s the best reduction available in the game. The downside is that it only works 1 in 5 tries, the other 4 doing nothing.
Redstone Venomworm instead reduced Physical Defense by 50%, with a chance it will reduce by 180%. You might think this is better, but in reality, due to the way calculations work, it will always reduce about half of the resistances. 180% reduced is still worse than completely removing the enemy resistance, which means that even if you get lucky with the roll, it’s still technically worse than Ironwood.
The reason you’d want to combine this is having less skills to press, having an additional glyphable skill, as well as it being much more reliable if you’re the only person in the squad with armour reducing capabilities, or in PVP where you cannot count on other allies to apply the debuff for you.
It’s a personal choice. Both have drawbacks and upsides, you can decide for yourself whether you want a weaker skill with more reliable functionality for PVE/PVP or you want the stronger debuff.
Sage or Demon?

Another commonly asked question is “should I pick demon or should I pick sage?”. Both options have their upsides and drawbacks, and is ultimately up to the player to decide.
Sage has stronger defenses in Fox Form, has stronger overall on-hit damage due to the passives granting higher damage numbers, has longer lasting buffs, better chi generation and an easier early endgame experience due to having stronger curses straight off the bat.
Demon has much higher mobility (the best in the game), better squad buffs, higher crit chance and better PVP skills.
Looking at this, you might think Sage is much better. And that is usually the case early game. Once you unlock glyphs, most of upsides of playing Sage are also converted to Demon with the addition of NF skills. Meaning Demon also gets the stronger debuffs.
Once you reach this point, the only difference between Demon and Sage remain the passives and very few specific skills. Demon keeps being much faster, having more crit and better utility for squad/pvp, while Sage remains tankier and easier to get out of bad situation, with slightly stronger sparks.
My recommendation is, if you’re just starting out on the server or it’s the first time you’re playing a Venomancer, pick Sage. It’s easier to get started and has better early-endgame progression. If you’re experience with Venomancer, have gear ready and/or prefer mobility over all else, go Demon.
Which blessing should I use?


For Venomancer, you have 2 choices. You can either pick between CT Blessing, which allows you to cast faster, or Jones’ Blessing, which grants you a damage boost.
For the vast majority of the content, CT Blessing is the better one because Venomancer has a rather high cast time on most skills, which can be easily reduced by just equipping the Blessing.
Jones has very specific use case that’s pretty off-meta, so generally, unless you’re very well geared and know what you’re doing, CT Blessing is the better one. I recommend buying both and trying them out to see which you prefer if you can afford them, but if you’d have to pick just one, go with CT Blessing.
Which engraves should I use on my gear?


For rings/amulets, the best engraves you can use on your gear will always be MAG. If you cannot get MAG, the 2nd best option is Magic Attack. If you choose a VIT/Tank build, VIT is not a bad choice. Those stats will boost your damage the most out of anything you can get. The 3rd best option is +ATT Level. For helmet, I recommend just going with the +150 m.ATT craft, it’s the best and least expensive one you can get for a long time.
For belt and cape, you can engrave 3 things. VIT, MDEF and PDEF. I suggest picking either VIT or PDEF. VIT will also grant a small amount of physical defense and is generally better for PVE.
Which Stones should I use in my gear?
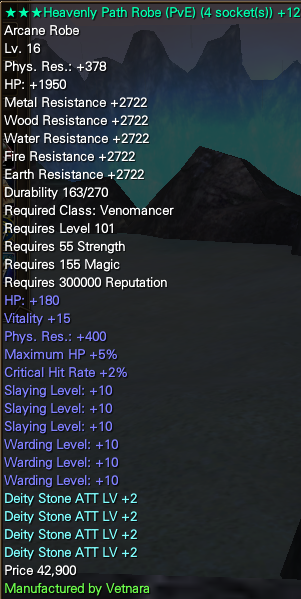
For armour pieces, you have 3 options. If you’re just starting out on the class, I recommend you use either Savant Stones, as those will grant you +10VIT. This will help a lot early-game, when you don’t have your passives yet, making you able to survive much easier. This build is recommended for people that are new to Veno, aren’t sure if they’ll want to invest more into the class, and/or just getting started with the game, as it’s by far the least expensive option. Recommended build variation for this is the VIT/MAG Hybrid.
The 2nd option is JOSD (Jade of Steady Defense). This is usually only recommended if you have a surplus of Diamond of Dragon, you don’t intend to use your veno as a DD, and you want to be even tankier than the VIT version. I recommend this for people that only use their Venos as an alt account and don’t intend on investing a lot into their character past Rank9 and medium level glyphs. The recommended build for this is the FULL VIT build.
The 3rd and most expensive option is full Deity. This will grant the most amount of damage, at the cost of being the least tanky out of the 3 options. I recommend this for people that intend to use their Venomancer as an off-DD, and only after they’ve already gone through a few HP/Defense passives, as it’s rather squishy. This build is also the recommended one if you’re planning on going the FULL MAG DD/Glass cannon build.
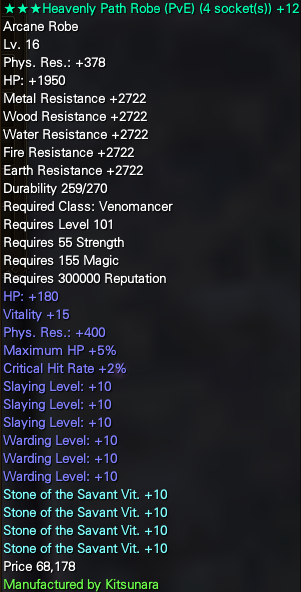
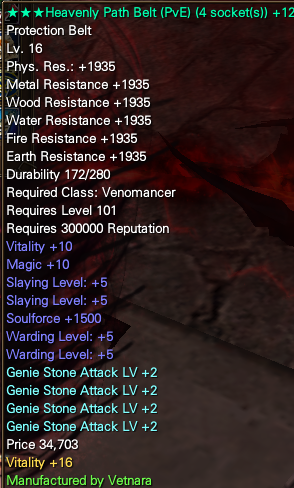
For accessories (Belt, Necklace) You have 4 options. If you’re going with the FULL DPS/MAG Build, you’ll want Genie Stones. These grant ATT LV and massively boost your damage.
Another option for the DPS/MAG build is Raven Stones. These grant Spirit, which generally is only useful for PVP, but it has a slight effect in PVE as well. They’re much cheaper than Genie Stones, and offer strong offensive capabilities (around 70% as strong as Genies for 1/4th the price!)
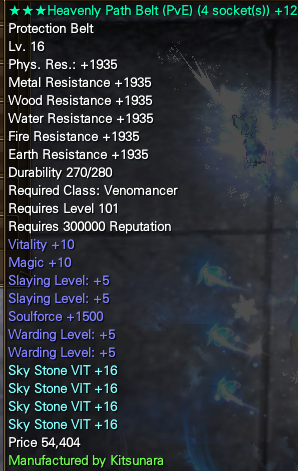
If you’re going the HYBRID MAG/VIT build, you’ll want Sky VIT stones. These are the upgraded stones which you get from combining Bloody Stones.
If you’re going the FULL VIT Build, the recommended stones are Sovereign Stones.

For the weapons, you have 2 options. You can either go with -Channeling or with +M.att.
Both options are just as viable and it comes down to preference. For Squad content, where you’ll mostly be always buffed and have access to channeling buffs, the Icebourne Stones (+100 M.att) are usually better for DD. If you’re playing Solo, not using a DD build or are early into your progression, I recommend using Savant Stones. Additionally, you can use Grand Origin instead of Savant if you can afford them, but they’re very expensive and generally not worth it unless you have disposable income for a very small difference. Alternatively, you can use a combination of Mag/Channeling. Try both variants out and see which you prefer, both are fine.

Which constellation should I use, and which orbs should I use?

For the constellation skill, you have a few options. The 3 best ones you can pick are All-In (which grants attack damage in exchange for resistances for a few seconds); Hypercharge (which grants additional cast speed and movement speed for a few seconds, only useful for solo since it doesn’t stack with other EP buffs), and Speed Force (which grants you maximum movement speed for a few seconds).
The skill doesn’t matter much because it’s only 10 seconds every 5 minutes, if you remember you even have it. I wouldn’t stress too much about it.
As for the orbs. The only real important choice is whether you want +ATT or +DEF in the Vermillion Bird constellation. For every other constellation, just use whichever orbs you manage to find with a good enough roll. You can replace them later so don’t stress on it.
If you’re going for the FULL MAG/Glass cannon build, you want +ATT level in your constellation.
If you’re picking the Hybrid VIT/MAG you can decide whether you want ATT or DEF based on whichever version of the build you’ll convert to.
If you’re picking the FULL VIT build, you’ll want +DEF in your constellation.
Which genie should I use, and which skills should I have on it?
Venomancer has a few picks for genies, depending on which build variant you went and depending what you want to do with them. This is primarily a PVE guide so I’ll be focusing on PVE genies.

The main genie you’ll want for solo & squad play is either a Zeal or a Discipline, as they are MAG/VIT based. Whichever you pick doesn’t really matter that much, as you’ll not be using their innate skill, and the stat distribution will be equal regardless of choice, so you can pick whichever you prefer the look of. Zeal has exactly 1 extra chi generation after reaching level 105 so it’s technically better but you’ll never notice it in real gameplay.
If you can afford it, Paramount is always the best choice for Venomancer, but they’re very rare and expensive.
Additionally, depending on whether or not you’ll ever use your Venomancer for squad play or not, you may opt in making a 2nd utility genie just for that, in particular for moments where nobody in your squad has strong debuffs. This is very niche and it’s not your job to do, so it’s entirely optional. The utility genie will be an Infliction genie due to the utility genie being a STR based one.
The main skills you’ll want on your genies are always Holy Path, Cloud Eruption or Chi Siphon and either Absolute Domain or Faith.
Other utility skills which are strong on Venomancer are Frenzy, Tree of Protection, Soul of Fire, Will Surge, Expel, Extreme Poison and Elemental Weakness.
These are up to you to mix and match however you prefer. Keep in mind some of these require more or less points in different elements, so you cannot have all of them at once. The genies shown above are my personal ones and they’re optimised for my gameplay.
Which Glyphs should I use on Venomancer?

There are many setups available based on which build you picked. These setups will be purely for PVE content.
The first setup will be the usual one you’ll be using for most content. It’s the highest DD variant, which goes well with the FULL MAG/DD Build.
The second setup is a more support-oriented setup. The damage it deals isn’t that great, but it has very easy chi generation, and is the better choice for people that just started out on the class and don’t have enough gear to properly DD. This is the preferred build for HYBRID MAG/VIT and FULL VIT build variants.


There are more options than these, with some very specific skills. For example, one very niche option is to pick Verdant(green) amplify damage. This however requires you do have Argent Venomous Scarab, Noxious Gas, Lucky Scarab and Redstone Venomworm. It also requires you to have another Venomancer in squad to set up the first AMP so you have time to set up your skill in order to have a stronger, longer-lasting AMP. Very niche pick, but worth mentioning.
Which glyphs should I prioritise? Which skills are the most effective for my high level glyphs?

The most important glyphs on Venomancer are Sanguine (red) Amplify Damage, Sanguine(red) Soul Degeneration, Argent(grey) Venomous Scarab, and Verdant(green) Parasitic Nova in that order. Anything else is not a main skill and can more or less be ignored and just used as placeholder until you get the skills you need.
Which macros should I use?
I suggest against using macros on a Venomancer. This is because the class itself is very reactive, meaning you need to change your rotation based on what is going on in the game. It also has a lot of instant cast skills, which the macros tend to skip over, messing up your rotation. However, the ideal rotations are the following
1. Solo debuffer DD rotation. This rotation is only used like this if you have no Barbarian, Archer, Duskblade, Wildwalker or Blademaster in your squad.
You start in Fox Form, you apply Soul Degeneration, use ((SANGUINE)) Crush Vigour to generate free CHI (don’t use it if it’s not glyphed, it’ll overwrite your other curses!), Purge (IF NEEDED, don’t waste it if target isn’t buffed), Myriad Fox, swap to Human form, Redstone Venomworm (or Ironwood), Parasitic Nova, Myriad Human, then Venomous Scarab until Amplify Damage goes off cooldown, at which point you repeat. It looks something like this if put in a macro:

2. Regular debuff DD rotation. This is used when you’re the only Venomancer but the other armour break buffs are covered by your squad.

You start in Fox form, apply Soul Degen, Amplify Damage, Purge (if needed), Myriad Fox, Turn back to Human, Myriad Human, then spam Venomous Scarab until AMP is off cooldown, then repeat
3. Pure DD rotation. This is only used on bosses that are immune to Amplify/Soul Degen.
You remain in human form all the time. You spam Venomous Scarab, Myriad Human and Ironwood Scarab off cooldown. If you have Redstone Venomworm, don’t use it.

Are there any skills I should avoid using/any hidden things I should know about?
Yes. There are a few skills which you can use which, while helpful, will interfere with your squad, many of which have a stronger variant than yours, making you essentially make your squad weaker than it should be.
The skills/buffs you have to look out for are the following:
Weaken: This is a physical resistance debuff. This can be applied by a lot of classes, Venomancer included. This debuff comes from Redstone Venomworm, Ironwood Scarab, and the 2 Myriad Skills. If you see this debuff on the enemy, it’s usually a higher number than yours. You can use Ironwood Scarab and Myriad if you have it, as they both reduce the resistance to 0. If you have Redstone Venomworm and see this debuff, don’t use it, you’re likely making it worse.
Curse: This is a damage multiplier for everyone hitting this target. This can be applied by a few classes, most notably BM. This is one of the strongest debuffs in the game, and as such you have to pay very close attention not to overwrite this debuff. It comes from Parasitic Nova (demon) or from the NF version of the skill. Don’t use Parasitic Nova while this is active on the target.
Amplify Damage: This can only be applied by Venomancers. As such, it’s either placed by you or another allied Venomancer. This curse can be overwritten by any other curse, so if you already applied Amplify, do not use any other curse until the timer runs out, or you will remove your own buff. This can also be overwritten by your Ultimate, so don’t use it while it’s active.
Those were the main player-applied debuffs you have to pay attention to. Now, for the self-buffs applied by monsters themselves:

The shield icon is a protection buff. This buff is specific to Flowsilver Palace dungeon. Bosses will buff themselves with this after being hit. This massively increases their physical and magical defenses, and needs to be Purged in order to get rid of it.
The Jaw icon on an orange background is a Health buff. Similar to Beast King Inspiration from Barbarian. It’s a massive health buff, and needs to be Purged.
The Blue semi-circle icon is a Health Regeneration buff. It’s similar to Ironheart Blessing from Cleric. It’s a health regeneration buff, usually not that important but should still be purged.
The Red shield icon is an Anti-APS buff. It cannot be purged, don’t need to worry about it.

The yellow arm on a brown background is a damage buff. Similar to Strength of the Titans from Barbarian. It’s a physical damage buff and needs to be purged.
The Black/blue hand is a damage buff. Similar to the one you get inside Heaven’s Wrath from Cleric. It’s a magic damage buff and needs to be purged.

The black figure on a yellow background is a movement speed buff. It’s similar to the speed buff granted by Archers. It’s not that important but needs to be purged.
The light yellow beam is an attack speed/crit buff. Similar to the one granted by Archers. It’s strong and needs to be purged.

The yellow/blue split star is a physical defense buff. It’s similar to the buff granted by Aura of the Golden Bell from Blademaster. It’s very strong and needs to be purged.

The red and blue man icons are health and mana regen buffs. They’re similar to the buffs granted by Cleric. Decently strong buffs and need to be purged.

The orange sun icon is a magic resistance buff. Similar to Magic Shell from Cleric. Very strong buff and needs to be purged as soon as possible.

Black/grey shield on a blue background is a physical resistance buff, similar to the one granted by Cleric. Very strong buff and needs to be purged as soon as possible.

Orange streak on a red background is a magic attack buff, similar to the one granted by Cleric. Very strong buff and needs to be purged as soon as possible.
Some bosses are immune to my curses! Anything I can do?

Not really. Some bosses are immune to curses, the most common one they’re immune to being Soul Degeneration, which lowers their maximum health.
You will have to find out which are immune and not through regular gameplay, but generally, most bosses in the overworld (main map) aren’t immune to anything.
Bosses in Flowsilver Palace are immune to Soul Degeneration’s -max% hp debuff but not the no regeneration part of it. They’re also not immune to Amplify Damage.
Bosses in Uncharted Paradise are immune to Soul Degeneration -max%hp and Purge, with the exception of the boss on Strategy Island which can be purged.
The last 3 bosses of MM1 and MM2 are immune to Amplify and Soul Degeneration -max% hp.
Pets Section
What do pets do? Why should I use them?

Pets offer one of the main reasons to play Venomancer in the first place.
It’s one of the 3 classes that has combat pets available, but it’s the only class in the game that can tame a wide variety of pets, some more useful than others. However, it’s part of the fun just running around collecting them and seeing them fight random mobs while you sit back.
While not very strong in the end-game, they’re an useful tool early on when you don’t have a lot of gear, using them as a secondary squad member to take aggro off of you, allowing you to learn the game more easily.
Additionally, they have some pretty strong benefits for having them out and around even after reaching the endgame.
How do I find which pets I can tame? How do I tame them?
In order to being taming pets, you will require the skill “Tame Beast”. This is rewarded very early on as part of a very short quest.
Once you have this skill, you can go around taming mobs and make them fight for you.
In order to find which mobs you can tame, you will have to look at their info bar at the top of your screen whenever you select a mob. Most of the mobs in the main world are tamable, once you exit the starting area of the game.
You will see (or not see) 2 different icons which represent your ability to tame the pet.

If you see just the name and nothing there, that means the pet is not available for taming, and you cannot get it.

If you see the green smiling face on the left side of the name, that means the pet is able to be tamed, and you’re above it’s level, making it easy for you to tame it.

If you see a red frowning face on the left side of the name, that means the pet is able to be tamed, but you’re under it’s level, making it impossible to tame until you level up some more.
Which pets are good? Which ones should I tame?
There are a few good pets to pick between. If you have no Event Gold available and would like to catch them out in the open, there are a few options that are stronger than the rest.
For land-based pets, they are split into 2 categories. DD pets and Tank pets.
DD pets that are recommended are Varicose Scorpion and Shadow Ranger.

These pets have the strongest attacks out of any free pets and have good abilities as well.
Tank pets that are recommended are Glacial Walker and Volcanic Magmite.

These pets have the strongest HP scaling and best aggro/tank skills allowing you to focus on healing them and having them kill your target instead of the mobs/bosses targeting you.
For the air-type pets, there are only 2 recommendations.

Petite Sawfly is the best fly-only pet, but the issue with it is that you need level 83+ in order to tame it, making it an end-game pet.
Cloud Skatefish is the third best flying-only pet, but it’s the best one for early game and it’s not a rare spawn making it a good option for when you’re just starting out.
For the water-type pets, there are also only 2 recommendations.
The best water-only pet is Celestial Plumpfish, but the issue is the same as Sawfly, you need level 80+ in order to tame it.

The other option is Highlands Tortoise (or any other Tortoise you like the look of, they’re very similar in stats).
For Legendary pets (all terrain) the best pet in the game, for PVE is Caspian Tiger and it’s evolution. These are only available through Event Gold and/or Cubi Gold, so you cannot catch these in the wild. They are much stronger than any of the pets on the list and are a very good investment if you want to solo most of the early game easily by just relying on your pet.

Alternatively, you can also pick Monkey King, for about half the price. It’s still pretty strong, and while it’s weaker than Caspian Tiger, it still offers competitive stats, much better than the others on the list, at a much lower price. It’s also the best PVP pet in the game, as it has a unique skill which allows it to stun targets, skill which cannot be taught to any other pet in the game.

Do these pets need any resources? What do I feed them?
The pets require food in order to be more effective and gain additional EXP while fighting. There are many food options for pets, the best option being Perfect Cookies.
You can buy these from any PW Boutique Agent around the world using Tokens of Luck.

Most pets will eat these Cookies. Buying them in mass is also not expensive, and grant the most amount of Loyalty out of each snack available in the game, making them an awesome choice.
For pets that refuse to eat Cookies, you can buy the other food types from any Pet Manager, although the other variants will take much longer to fill the Loyalty meter.
“What even is Loyalty?”
It’s a stat that increases by feeding the pet. The more loyalty it has, the higher the % of damage it does. This loyalty decreases whenever the pet dies, and increases when you keep it out, feed it and kill mobs.
How do I level up my pets & Evolve my pets?
There are 2 main ways of leveling your pets. The first option, and the worst one, is keeping the pet out and killing mobs using the pet. This will grant the pet experience and eventually level it up. However, it’s painfully slow to do and absolutely not time effective, as there are very cheap methods that speed this up by a lot.

That method I’m talking about is using Feral Soul Stars.

Disregard the text, as that’s not imporant. What you need to pay attention to is the way these work. You get Feral Soul Star Fragments (which are tradable) from MM1 boxes or by buying them from players. These are very inexpensive and only useful for Venomancer, so people tend to not even pick them up, making them available in massive quantities.
You wil need to convert the Feral Fragments to Feral Stars at the Goblin Miner NPC, under “Molten Trades”, and then traveling to the second Trade tab. It will be the rightmost option.

Each fragment is worth 3 stars, and you use the stars, not the fragments, to level up your pet.
You can use these by summoning your pet, then clicking the red smiley icon.

This will bring out a menu which allows you to feed the pet Feral Stars in order to level them up. Once the pet reaches a high enough level, if it’s a pet that has evolving capabilities, you will be able to Stow them, then Evolve them from the same window, using the button on the rightside of the window that pops up.
Evolving Pets is always a good idea, as it increases their stats even further and grants them new abilities which they wouldn’t have otherwise.

The only downside to evolving pets is that once they’re evolved you cannot de-evolve them, and evolved pets are untradable, making them be bound to the character you evolved them on. This is usually never a problem unless you’re using rare event-specific pets that you’re only displaying and would like to trade them later on.
Keep in mind that not all pets can evolve. Some only have their original version. However, almost all Legendary Petss have an evolve option. Your best bet is to either ask or consult the wiki in order to see which pets are able to evolve if it’s something that interests you.
What’s a pet mood? Does it mattter? Which one should I pick?

Once you’ve evolved your pet, you will see a new option pop up in the window where you evolved the pet and/or leveled them up. This will allow you to modify the pet’s mood using Feral Soul Stars. The mood dictates which mood-specific skills the pet will have. If you click the “mood list” button, you’ll see a list of all the moods the pet has available, all of which are random which ones you roll. The moods also have different levels, higher levels making the skills of that specific mood stronger.

Once you’ve decided which mood best suits your pet based on your needs, you will need to start mood training it. You do this by clicking the “mood training” button in the same menu. This will pop up a new menu which will show it’s current mood on the left, and the new mood it rolled on the right. If you like what you rolled, you can click “accept”. If you’d like to keep the current mood the pet has, click on “cancel” and try again. You can do this however many times you want, however keep in mind that even if you don’t end up accepting the new mood, it will still cost you Feral Stars to roll.
What’s up with the “inherited stats”? Which ones should I get?


Once a pet is evolved, you will be able to roll it’s stats, independently of the base stats it has, as well as the mood. The current (old) stats are displayed on the left, and the new stats are displayed on the rightside. If you prefer the old stats, you can cancel. If you prefer the new ones, you can Accept. Same deal as Mood training, can reroll as many times as you want. Each roll costs Feral Stars, even if you accept or not.
The stats that you want on the pet are entirely up to you, if you want an offensive pet aim for ATT/P.ATT and if you want a defensive pet aim for DEF/ DEFLV/ HP.
Can I teach my pet new skills?
Yes. There are a few skills which can be taught to your pet independently of the Mood system. You can find the books for this in Faction Base down the yellow hall, if your guild base is high enough level.
Other books can be found at the Zoologist in Archosaur, however keep in mind the books in Faction are usually better.

Once you have the scroll you want, you can either talk to the Zoologist and learn the skills there, or learn them from the user-interface in the Pet menu on P.

In order to teach the pet skills, the pet needs to be called out. If you have a pet skill in your inventory that the pet doesn’t already know, it will show up in this list, and allow you to learn it.
Keep in mind that pets only have a limited amount of skills that they’re able to have learned at a time, and cannot have the same skill learned twice, regardless of them being different percentages (For reference, Nubium Claw is 35% damage, it cannot have the same buff with a 30%).
Once you learn the skill, the pet should be able to use it in combat.
I cannot summon my pet! My pet keeps disappearing.
Pets in this game have certain limitations. There are some terrains which pets will avoid walking on even though it would make sense otherwise. One of these is the stone ramp in Orchid Temple. Another is the stone platform in Misfortune.
If the pet cannot pathfind to you, it will despawn after a few seconds. You also cannot summon pets on land that the pet cannot pathfind to.

You also need to pay attention to the type of terrain the pet is allowed on. In most endgame dungeons, you can only summon pets that are Land or All-terrain types. You cannot use Air-type or Water-type pets in instances even if it would make sense for them to be able to be there due to the way the instances are coded.
My pet keeps dying, anything I can do about it?
Not really. The pets are very squishy once you reach the endgame, and even the most well rolled ones have a tough time surviving most of the time.
You can extend their life by spamming Heal Pet (specifically the Morai variant of the skill) on your pet, as it will give them a 1 shot immunity and a 95% damage reduction from AoEs for a couple of seconds.
These are the buffs you’ll grant your pet when healing them. The first one is the 1 time death immunity, and the second one is the AoE damage reduction. Keep an eye out on your pet and if you see either of the debuffs disappearing, you can reapply them by using the Heal Pet skill.
How do I level up as Venomancer?
Venomancer has one of the easier leveling experiences due to being able to rely on pets to tank and do most of the damage.
It’s recommended to start with a rather tanky build if you don’t have endgame items, and with a Tank-type pet, such as Glacial Walker, Crystalline Magmite or Caspian Tiger if you can afford it.
You will mostly sit behind and spam-heal your pet while it kills the tougher bosses for you. Everything else is mostly the same as every other class. You can follow a separate guide for leveling and just apply the Venomancer/pet logic to it and see how it goes.
Thank you for reading my guide! Hope it was helpful.